Easy Oatmeal Cookies


You Will Need: 

  • 1 1/2 cup rolled oats (pulsed in a chopper, pulse several times to ground the rolled oats into more of a powder form, but it doesn't have to be real fine)
  • 1/2 cup salted butter (softened to room temperature)
  • 1/4 cup sugar
  • 1 egg 
  • 1/2 tsp. vanilla extract
  • couple of sprinkles of Ceylon cinnamon or other cinnamon
  •  toppings for the top of cookies like a few chocolate chips, raisins, nuts ect. (optional)

Preheat oven to 375 degrees

In a medium bowl, cream butter and sugar, add egg and whisk well, add vanilla, add the oatmeal by folding it into wet mixture. Scoop by the tablespoon, onto a parchment paper prepared cookie sheet about 2 inches apart, flatten with a spoon, add optional toppings if desired. Bake for 12 minutes or until the edges get golden brown. Remove cookies from pan and cool on a wire rack. 

Makes 19 cookies


Enjoy!

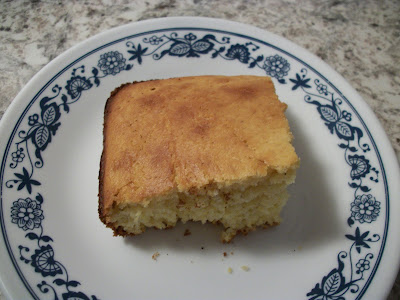
Sweet Yellow Cornbread


You Will Need:

  • 1 cup yellow cornmeal (I use Indian Head Brand)
  • 1 cup all-purpose unbleached flour
  • 1/2 cup sugar
  • 1 Tbsp. baking powder
  • 1 t. sea salt
  • 1 cup milk (whole or 2%)
  • 2 large eggs (beaten)
  • 1/2 stick salted butter (melted and slightly cooled)
  • 1/4 tsp. vanilla extract

Preheat oven to 400 degrees, grease 8 x 8 pan with butter.  In medium bowl combine dry ingredients, in a separate smaller bowl combine wet ingredients. Mix it into the dry ingredients until blended well. Pour into pan, Bake 25 minutes or until golden brown.
Or 12 muffin tin pan buttered and filled 2/3 full. Bake 25 minutes or until golden brown


This bread is a slightly sweet cornbread, and to me it compares to Jiffy brand cornbread, but in my opinion this made from scratch cornbread is better. I like that this homemade version has nothing added to it in the way of soybean oil or preservatives.

Enjoy!

Simple Shortbread Cookies (1800's Recipe)


You Will Need:

  • 2 1/4 cups all-purpose flour (I used unbleached)
  • 1/3 cup sugar
  • 1 cup butter 

Preheat oven to 325 degrees
Combine flour and sugar, grate in butter with a grater and mix with the backside of a spoon, until mixture resembles fine crumbs and starts to cling. Use fingers at this point to further mix and form into a ball, knead dough until smooth. Divide dough in half, on ungreased surface (sheet pan), pat or roll dough into a 6" square. Cut into 9 squares, then cut in half to make 18 triangles. Prick with fork. Leave triangles in large square.  Bake for 25-30 minutes until bottom just turns brown. Cut into triangles again while still hot. Cool on cookie sheet for 5 minutes. Remove from cookie sheet, cool on wire rack.

Makes 36 triangles

A small batch of these can be made by cutting the ingredients in half. I actually cut the ingredients by half, and then half again to make a batch of 12 triangles.

These are great with tea, they taste similar to the store bought name brand shortbread cookies, but they taste better, and without the preservatives. 

Enjoy!


Old Fashioned Blueberry Muffins


You Will Need: 

  • 1 cup all-purpose flour unbleached
  • 1/3 cup sugar
  • 1 tsp. baking powder
  • 1/4 tsp. salt
  • 1 egg
  • 1/4 milk ( whole or 2%)
  • 2 Tbsp. butter (salted) melted
  • 1/2 tsp. vanilla extract
  • 3/4 cup blueberries (frozen or fresh) If using frozen do not thaw

Preheat oven to 400 degrees. Grease muffin pan with butter. 

In small bowl, combine flour, sugar, baking powder and salt. In another bowl, whisk egg, milk, melted butter (that's been slightly cooled), and vanilla together, then stir into dry ingredients, until mixed. Fold in the blueberries. Fill muffin tins 3/4 full. Bake for 18-22 minutes until golden brown. Cool in the pan on a wire rack for 5 minutes before removing muffins from the pan. Now, turn over pan onto a plate or wire rack. If they don't drop from the pan easily, I carefully take a knife and go around each muffin's edge, then I slowly twist the muffin and lift it out with a spoon or fork. 

Makes 6 Muffins

Top with butter, if desired. 

These aren't overly sweet, but they are delicious! 

Enjoy!

Simple Healthy Salad


You Will Need: 

  • organic spring mix salad greens
  • desired amount of grated carrots or other veggies you'd like
  • sprinkle of salt, garlic powder, dried oregano leaves, dried dill weed, dried chives, dried basil leaves, dried thyme leaves, experiment with the amounts based on your taste, (if you have fresh herbs, you can certainly use them too)
  • a side of low fat cottage cheese (I use 1% milk fat) 
  • drizzled avocado oil (desired amount)

Place greens in a bowl, top with grated carrots and any other veggies you'd like, sprinkle with salt, garlic powder and desired herbs, put cottage cheese on the side and top with desired drizzled amount of avocado oil, top with bread crumbs. (for a homemade recipe of bread crumbs, see the post below this one, or look in the recipe index on the side bar of this website. You may have to click view web version of this website at the bottom of the page to find it, if you are viewing this website from a phone). 

A couple of months ago, I decided to stop using store bought salad dressing on my salad, and now I prefer my salad with the avocado oil and herbs mixture now. It's very fresh and tasty, and I feel I've cut down on some of the preservatives in my diet eating it this way. 

Enjoy!

Homemade Bread Crumbs


You Will Need:

  • 1-2 cups of leftover bread crumbled (I used 4-5 day old homemade bread)
  • about 1/2 tsp. kosher salt
  • sprinkle of garlic powder
  • sprinkle of Italian seasonings (optional)
  • 1/2 tsp. sugar

Preheat oven to 300 degrees, in a bowl combine ingredients, spread crumb mixture evenly on a sheet pan, cook for 5 minutes, then use a spatula to turn over the crumbs, stir around and spread evenly again on the pan cook another 5 minutes, turn over the crumbs and stir around again, and cook again until desired crispness about 5 more minutes, let cool, then store in plastic bag or container for use in recipes. Can be frozen up to 3 months. If using from freezer, let them thaw on paper towels before use in recipes, you can also re-crisp them if needed, in the oven for 5 minutes or until crispy.


I love to put these bread crumbs on top of my salads, I use them now instead of Ritz Crackers, they give a salty-sweet taste and a little bit of cracker crispiness.

Enjoy!

Basic Bread Recipe For Elite Gourmet Bread Maker


This recipe is for use in The Elite Gourmet Bread Maker Programmable Bread Maker, Recipe is for the 1lb. Basic Bread Setting

You Will Need: 

  • 210 ml water (slightly warm)
  • 1 1/2 Tbsp. Oil (I use avocado)
  • 1/2 tsp sea salt
  • 1 Tbsp. of sugar
  • 2 1/3 cup bread flour
  • 1 tsp. instant yeast
Put ingredients into bread maker pan in the order above, starting with the water, do not stir, place pan in bread maker, set on Program 1 (Basic), 1 lb. weight, and medium color setting. Timer will display 2:55. 
Bread will be ready in 2 hours 55 minutes, bread maker timer will beep when done and display time will display 0:00 when finished. Using oven mitts, remove the pan from the bread maker, remove the bread from the pan by shaking loose, it does not stick and falls right out, cool on a wire rack. 

So easy, tasty, and we like that we know what went into our bread. I highly recommend this bread maker for ease of use. 

Our bread keeps in a gallon size plastic bag or on a cake plate underneath a glass dome for 2 days for sandwiches.  On the 3rd and 4th day, we toast it for sandwiches. If any bread is left over after the 4th day, I make bread crumbs to use on top of my salads or in recipes like casseroles and meatloaf.  
For the bread crumbs recipe, scroll to the post above this one, or view the recipe index on the right-hand side of this website. If you are viewing this with a phone, you may need to go to the bottom of the page and click view web version to find the recipe index. 

Enjoy!


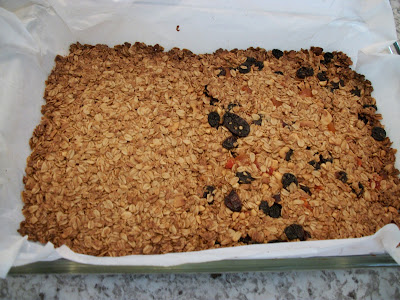
Easy Homemade Granola Bars


You Will Need: 

  • 2 1/2 cups old fashioned oats
  • 2 Tablespoons sugar
  • 1/3 cup coconut oil (melted) 
  • 1/3 cup honey
  • 1 tsp. vanilla extract
  • desired amount or handful of add-ins like nuts, seeds, shredded coconut, dried fruit, and chocolate chips (optional) 

Preheat oven to 350 degrees,  line a 9 x 13 pan or casserole dish with parchment paper, (Note: I recommend using only this size pan because any other size will not allow these to crisp to the desired crispness).

 In a large bowl mix ingredients together, mix in add-ins last. I divide the mixture and make half plain bars, (I love them plain), and half with the add-ins that my husband likes. Place mixture in the lined pan and spread out evenly using another piece of parchment paper or wax paper to press the granola down. 

Bake 25-30 minutes until golden brown. 
When they are done, lift the parchment paper from the pan and place on a baking rack to cool. 

Cool completely, cut into squares, store in an airtight container or plastic bags. Will stay fresh 2 weeks. 

These are delicious! They taste similar to the store bought granola bars that are in the green package, but better.

Enjoy!

Sausage White Gravy For Biscuits


You Will Need:
  • 1/4 pound ground sausage 
  • salt and pepper to taste
  • 2 Tablespoons all-purpose flour (I use unbleached)
  • about 2 cups of whole or 2 % milk,  more or less depending on desired consistency 
In a skillet cook ground sausage on medium high heat, stir it around until it's browned and no longer pink, add flour, stir well, then add some milk and stir constantly, it will begin to thicken, add more milk for the consistency of thickness you'd like. Salt and pepper to taste. 

Serve over biscuits (an easy Homemade Biscuit recipe can be found in the post below this one, or in the sidebar index of recipes on this website, note: you may have to view in the web version to find the index of recipes, it may not show up if you are viewing on a phone), you could also serve this over toasted bread.

This makes enough gravy to serve over 5 large biscuits.  If you would like more gravy and not as much meat, you can double the ingredients, besides the amount of meat, and you'll get a gravy with less bits of meat in it and more white gravy. 

Enjoy! 


Easy Biscuits From Scratch


You Will Need: 

  • 1 cup all purpose flour sifted (I use unbleached)
  • 1/2 tsp. salt
  • 2 tsp. baking powder
  • 3 Tablespoons salted butter
  • 1/2 cup milk (you may not need all of the milk it depends on the humidity in the air, you'll add it into dry ingredients a little at a time)  

Preheat oven to 450 degrees. 

In a medium bowl, mix dry ingredients together, grate the butter in and mix together with back of a spoon, then use fingers to mix it in better. Add milk a little at a time by the tablespoon. You want a smooth dough that you can roll out. If you find that the dough is too sticky, add a little more flour. Once the dough can be made into a soft ball that's not sticky, roll it out about 1/2 inch thick onto a floured surface, (I used a chopping block to roll mine out). Cut with a biscuit cutter or glass turned upside down. Place biscuits on a baking sheet 2 inches apart.  Bake for 10-12 minutes. 

Makes 5 Biscuits 

Enjoy! 

Cream of Chicken Soup & Chicken Broth (For Recipes)


CREAM OF CHICKEN SOUP 

You Will Need:

  • 4 Tablespoons of butter
  • 1/2 cup plus 2 Tablespoons flour (I use unbleached all purpose)
  • 2 cups chicken broth (made from boiling chicken thighs or whole chicken *Recipe is below)
  • 1 cup milk (whole milk will make this richer, but 2% milk can be used)
  • 1 stalk celery that's been chopped and sauteed in butter, (I use sauteed celery, but 1/4 tsp. celery powder can be substituted) 
  • small amount of chopped yellow onion, sauteed in butter, about equal to the amount of celery used, (I use sauteed onion,  but 1/4 tsp. onion powder can be substituted)
  • 1/3 tsp. garlic powder
  • 1/2 tsp. sea salt
  • sprinkle black pepper (optional)

In a small pot warm milk to room temperature set aside. In a large pot melt butter over medium heat, cook about 2 to 3 minutes. Add flour and whisk continuously for 3-5 minutes, mixture will look dry. Remove from the heat,  add half of the chicken broth, whisk well, add the other half and whisk well, add milk, seasoning, and cooked onion and celery, mix well. Return to heat medium-high, continue whisking so that it is smooth, and until it gets thick. Remove from heat once it thickens. It will thicken more after removed from heat. 
Note: this recipe will require constantly stirring with whisk. 

This makes 2, 10.5oz cans of soup that you can use in recipes. This can be refrigerated up to a week and frozen up to 4 months. Recipe can be doubled or tripled for freezing and prepping for future recipes.

Enjoy!


HOMEMADE CHICKEN BROTH RECIPE
(Sorry, I forgot to get a photo of the broth and it's frozen now) 

You Will Need:
  • 4 chicken thighs or a whole chicken
  • water to cover chicken 
  • heaping teaspoon of sea salt 
  • sprinkle of poultry seasoning (I just sprinkle a little bit in)
  • sprinkled desired amount of black pepper (optional)
  • celery, carrots, onions, (optional)

Place ingredients in a large Dutch oven pot or a stock pot, bring to a boil on high heat, reduce heat to a simmer low boil, cover with a lid tilted, and cook for 45minutes to an hour. I cook a whole chicken for an hour, chicken pieces will take a little less time. I check to make sure it's done by poking it with a fork, to make sure no blood comes from the chicken. When done, carefully remove chicken from pot, place on a plate, set aside, to cool, then debone for a recipe. Broth is ready to use in recipes calling for chicken broth. To freeze, let the broth cool, then pour into freezer containers to freeze. Leave about a  1/2 inch space between the freezer container and lid, for expansion of liquid, as it becomes frozen.  A fat separating measuring cup can be used to separate the fat from the broth, if desired. 

Note: I've used both homemade chicken broth and homemade cream of chicken soup in my recipes to  reduce the amount of preservatives in our diet. It tastes better to us than store bought. It does take some planning ahead for meals, like making sure broth and cream of chicken soup is in the freezer, but it is so worth it, because at least I know what went into it. 

Enjoy!

Oatmeal Carrot Muffins


You Will Need:

  • 1 cup milk
  • 1/8 cup melted coconut oil (slightly cooled)
  • 2 Tablespoon melted salted butter (slightly cooled)
  • 2 eggs
  • 1/3 cup maple syrup
  • 1 tsp. vanilla extract
  • 1 cup unbleached all purpose flour
  • 2 cups old fashioned rolled oats 
  • 2 tsp. Ceylon cinnamon or 1 1/2 tsp. regular cinnamon
  • 1 tsp. baking powder
  • 1/2 tsp. sea salt
  • 1 cup shredded carrots
  • about 1/2 cup  or more of desired add-ins, like raisins, dates, shredded coconut, pumpkin seeds, cashews, walnuts, or other nuts, and chocolate chips.  Note: I  divide our muffin mixture evenly into two separate bowls, before adding the add-ins, so that I can make half of the muffins with just a chopped date and the other half with the add-ins that my husband likes. He likes to add trail mix with dried fruits, nuts, and coconut, and a few chocolate chips, and a few walnuts. 
Preheat oven to 350, grease muffin pans with butter
Note: Recipe makes 12-14 muffins depending on the amount of add-ins you add. 

In a large bowl mix milk, eggs, maple syrup, vanilla extract and melted coconut oil and butter until combined. Stir in dry ingredients, fold in carrots and other add-in ingredients. Spoon into buttered muffin pans, filling each muffin tin to almost full. Bake 40 minutes or until golden brown. Take out of the oven, carefully take a knife and cut around the edge of each muffin, and then let them cool in pan for a couple of minutes, then carefully twist the muffins to loosen them out of the pan, lift out with a fork. Let cool completely on baking racks. Store underneath a glass dome cake plate or in airtight container. Best if eaten within 3 days, can be reheated in the oven, if desired. (We like to reheat them on the 3rd day, for improved texture and flavor, in 350 degree oven for 8 minutes). 

Note: 
For an extra treat, you can add a glaze to the top of these after they are cool. For the glaze you don't even have to measure, just put some sifted confectioner's sugar in a small bowl, add in a tablespoon of milk, and mix, then add in more milk a little at a time until desired consistency, a few drops of vanilla extract can be added as well.....so easy and tastes yummy! 

Enjoy!


Slow Cooker Creamy Ranch Chicken and Potatoes


You Will Need: 

  • 4 boneless skinless chicken breast or a pound of chicken breast strips
  • 6 medium russet potatoes, skins left on, and cut into chunks 
  • 6-8 carrots peeled and sliced or use 2 cups of baby carrots
  • 1 large can of cream of chicken soup (about 24 oz) or a can and a half if using regular size can
  • 1 packet dry ranch dressing mix 
  • 1/2 cup milk
  • 2 Tablespoons of butter
  • sprinkle of chives (optional)

Grease slow cooker, place veggies in, then chicken, in a bowl mix other ingredients, (except butter), pour it over chicken, top with slices of butter, and sprinkle of chives.

Cook on low 7-8 hours or on high for 4-5 hours

Enjoy!